

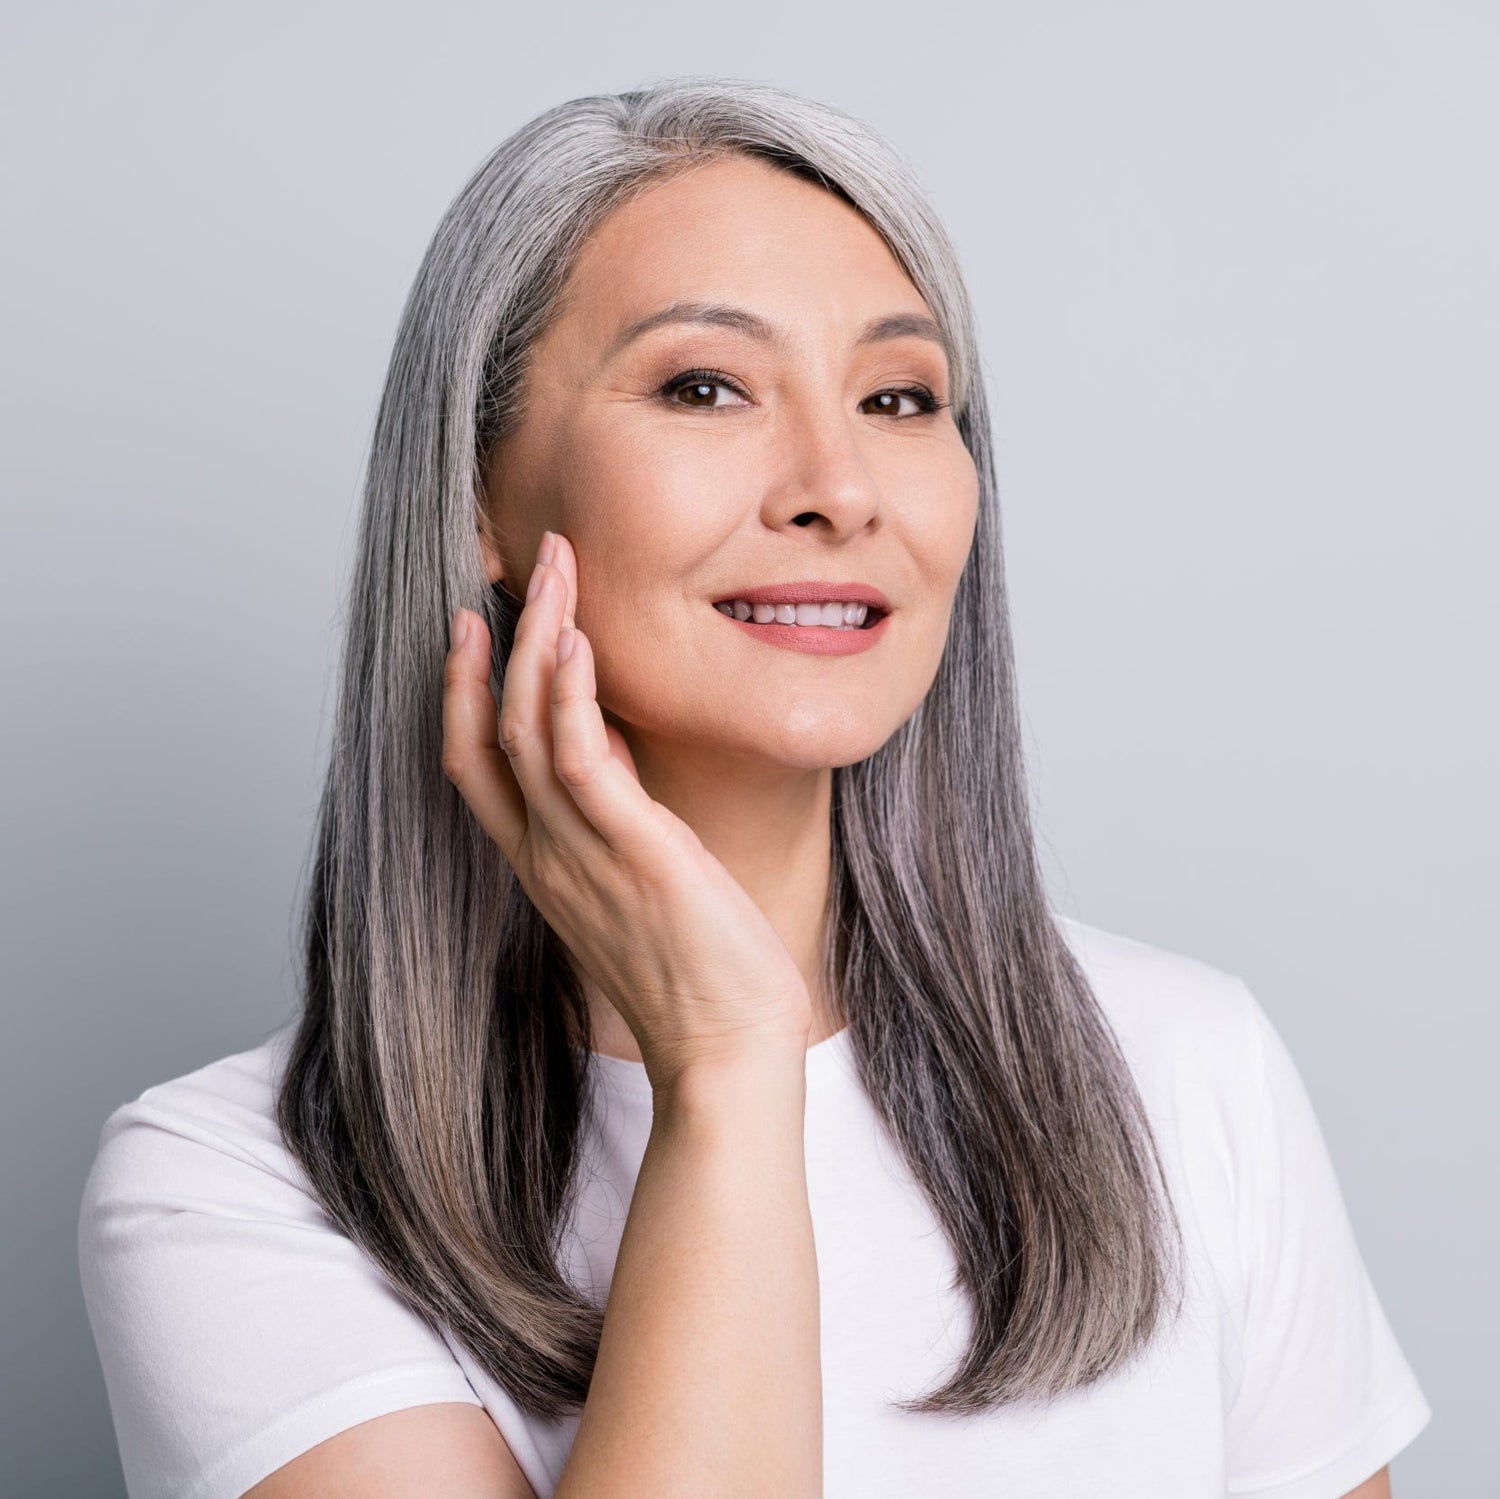
Ultimate Makeup Tutorial for Gray Hair
WELCOME TO THE TUTORIAL
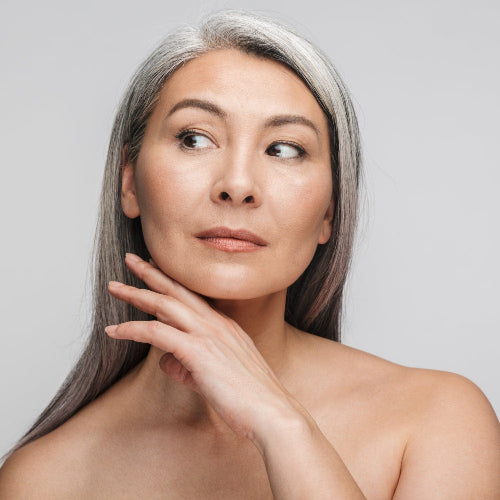
Embracing your natural silver strands can take a little getting used to, but it's a journey worth taking. And along the way, you might find yourself needing to tweak your makeup routine for that perfect touch.
Wondering what is the best makeup for gray hair? We're here to help you with the best silver makeup looks! Whether you’ve recently started transitioning your color or have been living with steel-colored strands for a while, mastering the art of makeup can be a challenge. In this comprehensive blog post, we will walk through beauty tips for gray hair, including step-by-step tutorials on eyebrow makeup, eyeliner, mascara, foundation/tinted moisturizer and lipstick—all adapted just for women with naturally gray hair! With these helpful hints and recommended products, you'll be ready to rock any look with your beautiful gray hair!
 Pro Tip: Know Your Undertone
Are you warm or cool? Knowing your skin undertone is key to finding the right color palette to accentuate your features and not looking washed-out.
UNDERSTANDING COLOR UNDERTONES
Section Takeaways
- The importance of identifying undertones
- How to identify your undertones
- The role of undertones in choosing makeup colors
In the world of beauty and makeup, understanding your color undertones is paramount. Why, you ask? Well, your undertones play a pivotal role in how certain shades and colors will appear on your skin. They can greatly influence whether a product enhances your natural beauty or seems slightly off-kilter. From picking out the perfect lipstick to finding a foundation that seamlessly blends with your skin, your undertones are the invisible guide helping you make these decisions.

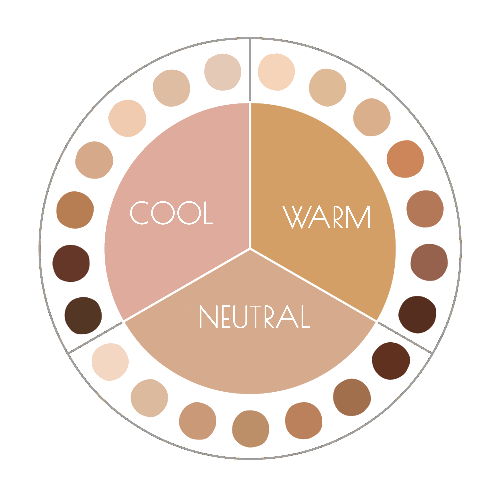
Now, if you're wondering, "What exactly are these undertones and how do they affect my makeup choices?" let's break it down. Your skin's undertones are the colors beneath the surface that can be warm, cool, or neutral. These subtle hues affect the overall shade of your complexion, and knowing them can be the difference between a makeup look that pops and one that flops.
The good news? Determining your undertones isn't some arcane art reserved for makeup gurus.
There are simple tests you can do right at home to identify whether you have warm, cool, or neutral undertones. Excited to find out more? We've got you covered! Check out our undertone tutorial here to learn how you can easily determine your skin's undertones before continuing with the rest of this tutorial. Ready? Let's dive in now and let your undertones guide you towards your best makeup look yet!
THE ART OF PERFECT BROWS
Section Takeaways
- The importance of eyebrows in framing the face
- How to choose the right eyebrow pencil color for gray hair
- Eyebrow pencils versus powders
- The angled eyebrow brush
- How to tweeze eyebrows
- Step-by-step guide to filling in eyebrows
One element often overlooked yet incredibly powerful, is the art of perfect brows.
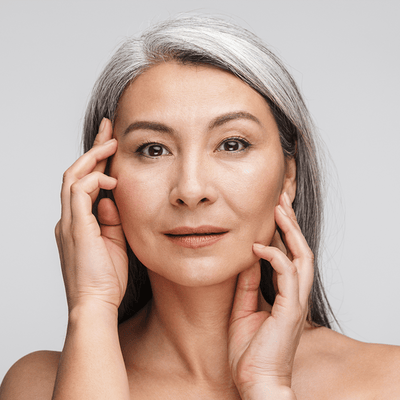

Why are eyebrows so important? Simply put, they are the picture frames for your eyes and play a significant role in shaping and defining your face.
Now, we've all had our fair share of eyebrow faux pas. Whether a cause of over-plucking in the 90's or just effects of aging, many foxy mature ladies have patchy, sparse brows. Sparse or thin eyebrows could actually age you, so it's important to get your brows in top shape! Other common mistakes when filling in eyebrows range from choosing the wrong color, overfilling, or simply creating an unnatural shape.
HOW TO CHOOSE THE RIGHT COLOR EYEBROW MAKEUP
Many women with gray hair make the mistake of continuing to fill their eyebrows with the same pencil or powder they used before turning gray. This creates dark eyebrows that contrast unnaturally with your beautiful silver mane. If you have light gray or silver hair, stay away from charcoal, brown, or black pencils and powders!
Conversely, other silver-haired women don't fill in their eyebrows at all, making them look washed out. When you have gray hair, your eyebrows become even more important. Filled brows frame your face, instantly elevating your look and will make your appear more youthful.
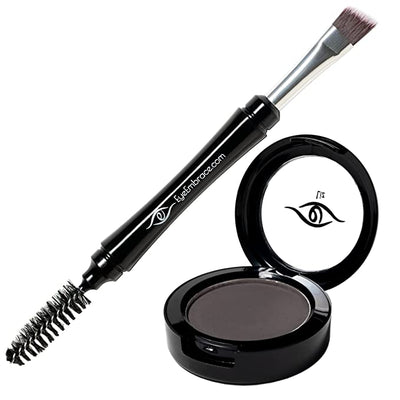
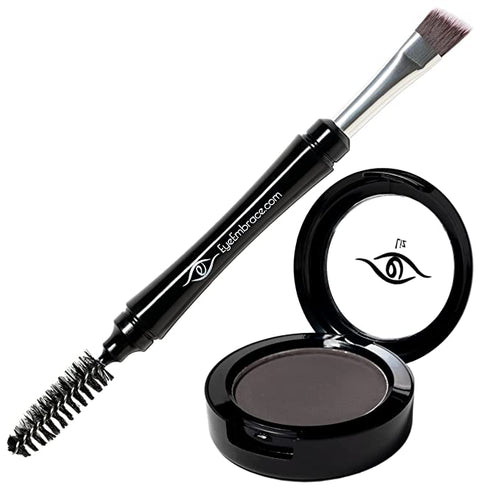
We suggest you try to complement your natural eyebrow color with gray eyebrow pencils.Our current collection includes Eye Embrace diamond wedge eyebrow pencils, classic wooden eyebrow pencils, eyebrow powders, and micro tip eyebrow pencils, in a range of colors that complement different hair colors and undertones.


Pro Tip: Be Sure to Experiment
Remember, there is no one-size-fits-all when it comes to eyebrow products. Experimenting with each type will help you find what suits your personal style and eyebrow needs. So, don't be afraid to mix and match these tools to achieve your desired eyebrow look!
EYEBROW PENCIL OR EYEBROW POWDER? THE DIFFERENCE AND WHEN TO USE EACH
When deciding on makeup for eyebrows, your choices typically revolve around three main products: eyebrow pencil, eyebrow powder, and eyebrow gel. Understanding how each one works will enable you to make the best choice for your brows and desired look.
Eyebrow Pencil: This is the go-to product for those who want to define their eyebrows with precision. It's perfect for filling in sparse spots and drawing in fine, hair-like strokes. Eyebrow pencils are typically easy to control, allowing you to create natural-looking brows with a soft or dramatic look, depending on how much pressure you apply.
Eyebrow Powder: If you're aiming for a soft and natural brow look, then eyebrow powder is your best bet. The powder fills in your brows with a matte finish that mimics the appearance of actual brow hair. It's also great for adding volume to thin eyebrows. However, powder might not stick to very sparse areas as well as a pencil would.
Eyebrow Gel: Want to keep your brows in place all day? Eyebrow gel works like hairspray for your eyebrows. It's great for taming unruly brows and adding a polished finish to your makeup look. Clear gel can be used to set the brows after filling in with a pencil or powder, while tinted gel adds some color and subtle definition, making it a good option for quick, low-maintenance days.
Remember, there is no one-size-fits-all when it comes to eyebrow products. Experimenting with each type will help you find what suits your personal style and eyebrow needs. So, don't be afraid to mix and match these tools to achieve your desired eyebrow look!
Pro Tip: Wash Your Brushes
Remember to wash your brushes! Makeup brushes can be a hotbed for bacteria, and the internet is full of horror stories of what can happen to your face if you aren’t diligent about cleaning makeup brushes or eyelash curlers. While there are specialized brush cleansers, we’ve found that a gentle liquid soap or baby shampoo works just as well.
EYEBROW TOOLS
-
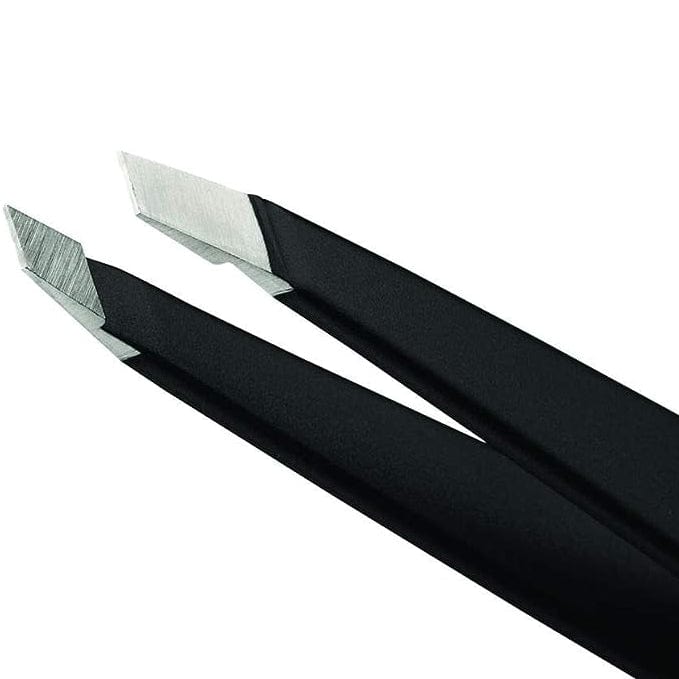
Tweezers
A precision set of tweezer like Tweezerman's Stainless Steel Slant Tweezer with a 25 degree slanted tip gives you a perfect angle for working against the brow bone.
-
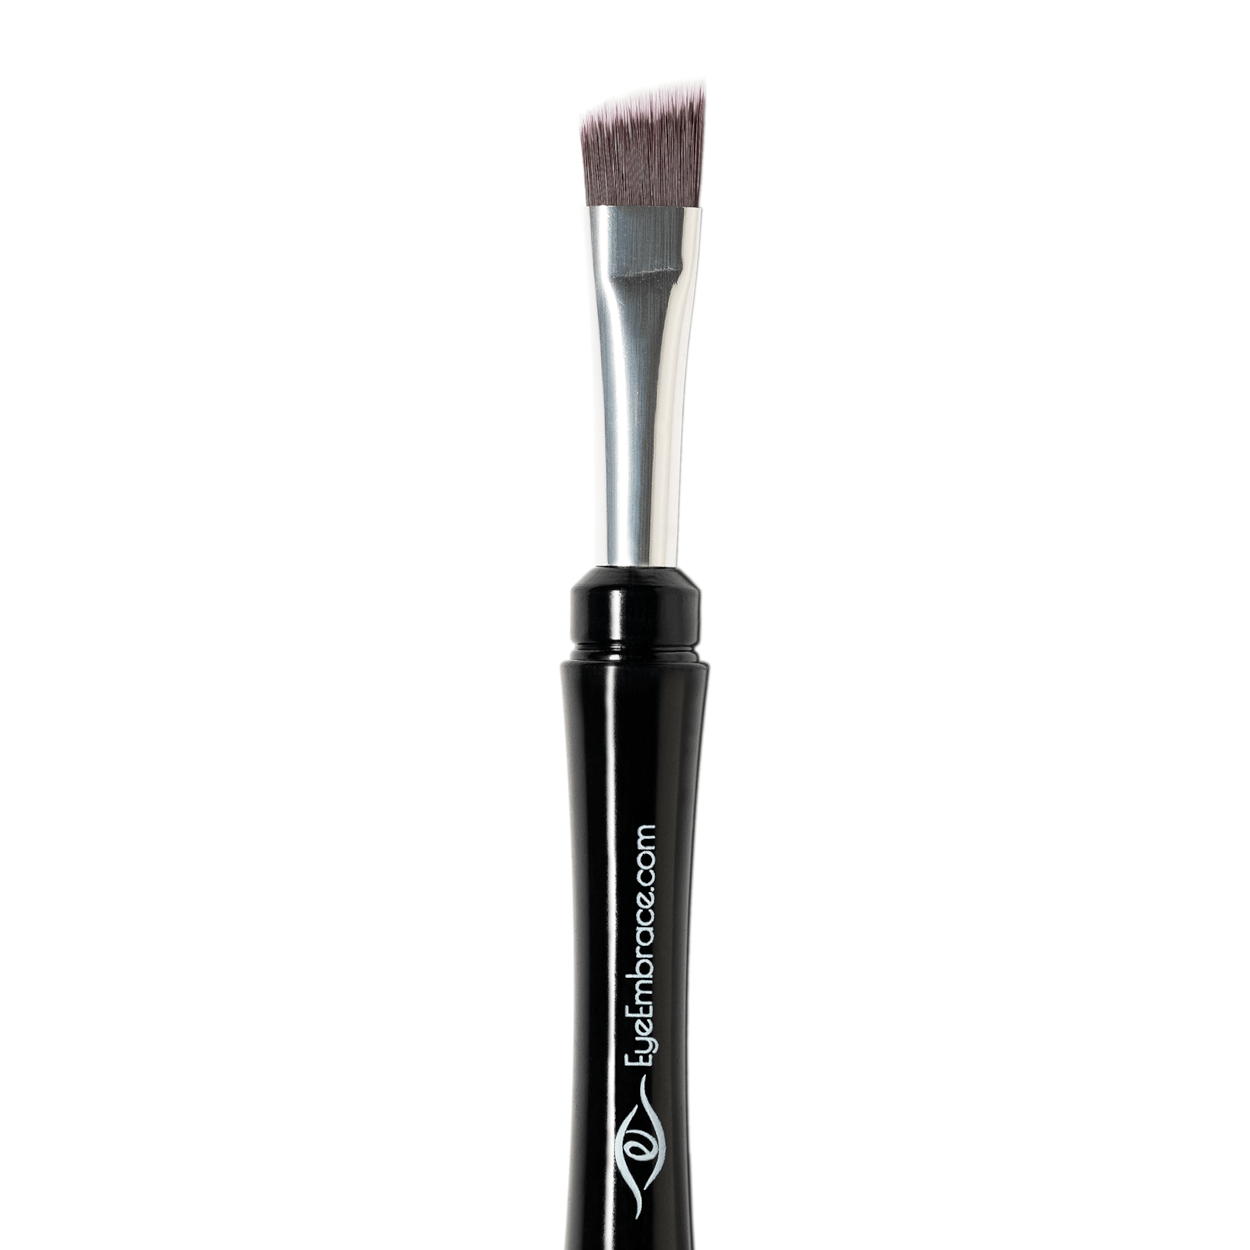
Angled Brush
If you are planning on using eyebrow powders or applying eyebrow coloring with mechanical or wooden eyebrow pencils, having an angled brush to blend product is a requirement.
-
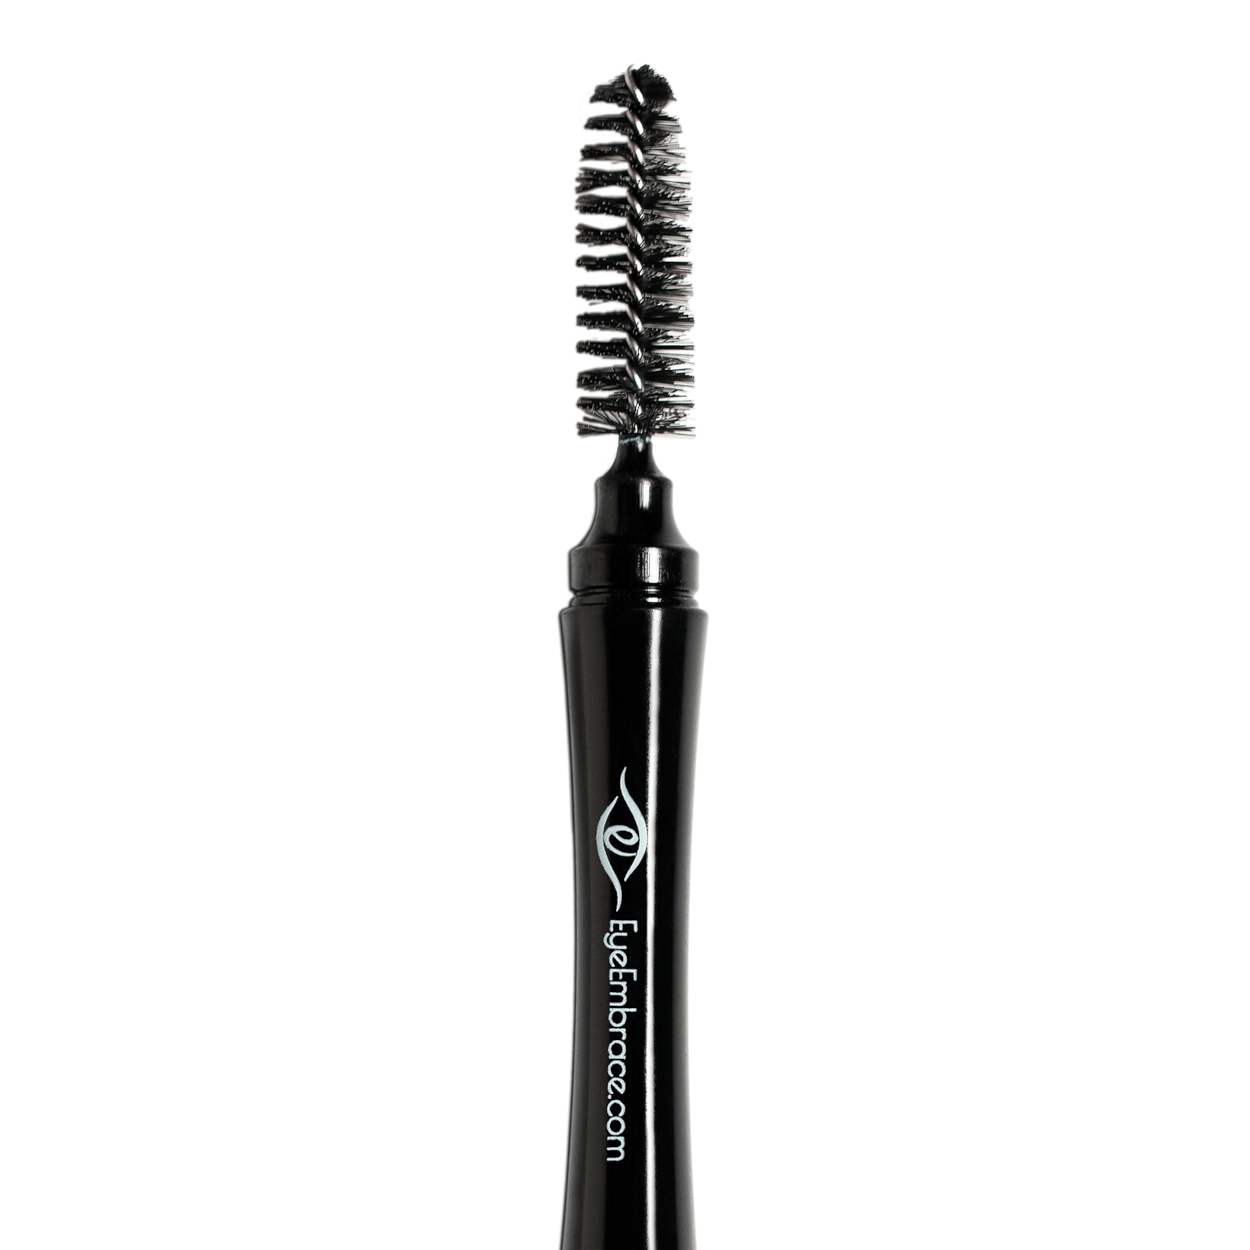
Spoolie Brush
A spoolie brush will help you straighten out those pesky stray eyebrow hairs for a sleek and refined eyebrow look. Definitely acquire a double ended brush like the Pro Grip Angled Brush by Eye Embrace.


MASTERING THE ANGLED EYEBROW BRUSH WITH EYEBROW POWDER
An integral part of creating the perfect eyebrows is understanding how to use different tools, and the angled eyebrow brush is a key player in the eyebrow game. Paired with eyebrow powder, it can work wonders in creating a soft and natural look.
The angled eyebrow brush is characterized by its slanted bristles, making it perfect for precise application of eyebrow powder. Its design allows you to create hair-like strokes, resulting in a natural and fuller look.
Using an angled eyebrow brush with eyebrow powder is quite straightforward. Start by dipping the brush into the powder and tap off any excess. Then, using short, upward strokes, begin filling in any sparse areas in the direction of your hair growth. The goal here is to mimic your natural brow hairs, so remember to keep your strokes light and fine.
For the tail end of your brows, angle your brush to create a defined, tapered finish. You can also use the brush to blend the powder for a seamless look. Once you're satisfied, set your brows with a clear or tinted gel to keep them in place.
Pro Tip: A Brush for Each Color
One way to optimize your makeup routine is to buy a brush for each color you are applying. Label the brush and reuse without accidentally blending colors.

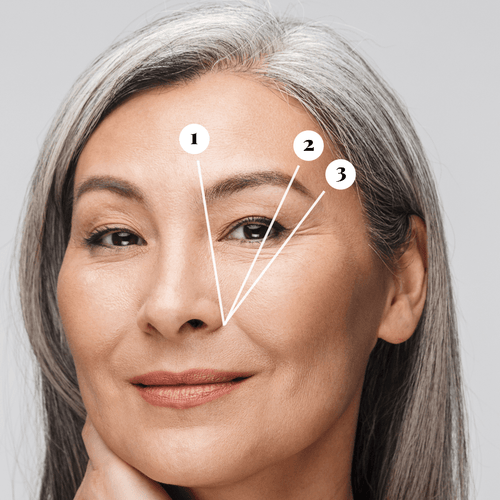
HOW TO TWEEZE EYEBROWS
Tweeze and shape your eyebrows by imagining 3 lines going out from the outside of your nose:
- One straight up
- One connecting to the outside of your pupil
- One connecting to the outer corner of your eye
Your eyebrow should start just to the outside of your nose bridge (line 1). The peak of the arch of your brow should align to the outer edge of your pupil (line 2). Taper off your brow at the outer corner of your eye (line 3).
Using a sharp pair of tweezers, pluck any stray hairs outside of your defined shape. We also recommend trying one of the many eyebrow growth serums to stimulate hair growth.
Pro Tip: Easy on the Plucking
Take it easy on plucking your eyebrow hairs. Focus on the stray ones that are not going to be part of your overall shape. Over plucking can lead to permanent eyebrow hair loss, so keep that in mind.
STEP BY STEP GUIDE TO FILLING IN EYEBROWS
Are you wondering how to choose just the right eyebrow pencil color, particularly when you have gorgeous gray hair? We've got you covered. The key is balance - you don't want your eyebrows to be too dark, creating a harsh contrast with your gray hair. Yet, going too light might wash out your face and make your eyebrows disappear. Aim for a shade that's a mix of gray, brown, and taupe. This will add definition without overpowering your features.
- Start Clean: Begin with clean, dry eyebrows. Use a spoolie brush to comb your brows into their natural shape.
- Outline: Using your chosen brow pencil, lightly outline the bottom and top of your eyebrows, following their natural arch.
- Fill In: Make light, feathery strokes to fill in sparse areas, always moving in the direction of your hair growth.
- Blend: Use a spoolie to gently blend the color, creating a natural finish.
- Set: Finish off with a clear or tinted eyebrow gel to set your brows in place.
Voila! You've mastered the art of perfect brows! Remember, practice makes perfect, so don't be disheartened if it takes a few tries to get right. Your perfect brows are worth it!
EYE CREAMS AND PRIMERS: THE KEY TO FLAWLESS EYE MAKEUP
When it comes to having beautiful gray hair, the eyes are often the most expressive feature. Yet, getting that perfect look can be a challenge. That's why prepping your eyes with the right products and techniques is key.
The best way to get that flawless eye makeup look? Start by applying an eye cream and primer tailored for mature skin. Eye creams are essential in helping hydrate, reduce puffiness, and combat dark circles—all factors that can be exacerbated as we age. A good eye primer also helps create a smooth canvas for your eye makeup, allowing colors to easily blend together. It also helps prevent fading and creasing throughout the day or night.
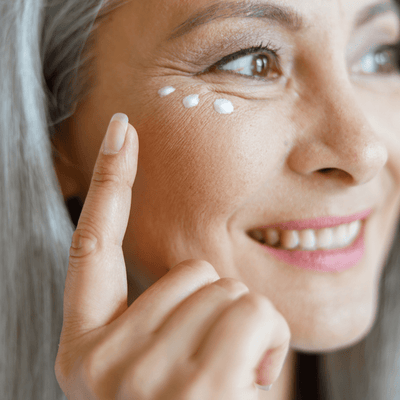
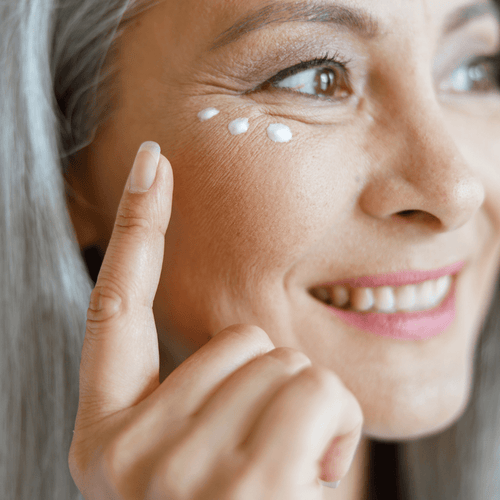
MOISTURIZE
Eye creams should be part of your daily skincare routine. This part of your routine is even more important as you age as our skin gets drier. A moisturized eye area will reduce any fine lines that product can potentially settle into. A good eye cream can also lighten dark circles and reduce puffiness to boot. We particularly like the Organys Moisturizer Appearance eye cream for the morning, and ROC Retinol Correxion Eye Cream or Kate Somerville Retinol Firming Eye Cream at night. Finish off your eye skincare routine with an eye mask at least once a week.
PRIME
If you are going to use any makeup near your eye area, always use a primer! Primer helps create a smooth surface and ensures your makeup lasts all day and into the night. We are a big fan of Urban Decay's Anti-Aging Eyeshadow Primer Potion. This powerful formula will hold up against anything you put it through, whether it’s extreme humidity or just a long day. We rarely go a day without using this primer under our eye makeup, and a little product goes a long way.
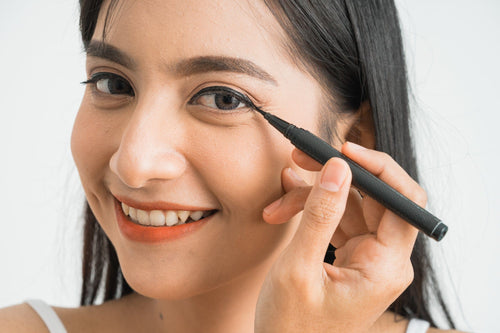
EYELINER: ENHANCING THE WINDOWS TO THE SOUL
Section Takeaways
- The role of eyeliner in accentuating the eyes
- Choosing the right color and type of eyeliner
- Step-by-step guide to applying eyeliner
- Pro tips to avoid common mistakes
Eyeliner works wonders in enhancing our eyes, especially for those with gray hair. It has the power to instantly transform and accentuate your eyes, making them look bigger, brighter, and more defined.
First off, let's talk color. For a softer, natural look, browns, grays, and navy blues can be your go-to shades. If you're aiming for drama, nothing beats the classic black. But remember, the color should complement your skin tone and eye color. Ladies with blue eyes might find that bronze or copper liners make their eyes pop, while those with brown eyes could experiment with vibrant blues or purples.
There are three main types of eyeliner: pencil, gel, and liquid. Pencil eyeliner is the easiest to apply, but it may not give you the same level of precision and cleanliness as gel or liquid liners. Gel liners effortlessly glide on the lids and can usually come in a pot with a brush. Liquid liners, on the other hand, provide the most precise and long-lasting application, although mastering the technique may require some practice. Ultimately, the choice of eyeliner type comes down to personal preference – try different types for different situations and looks!
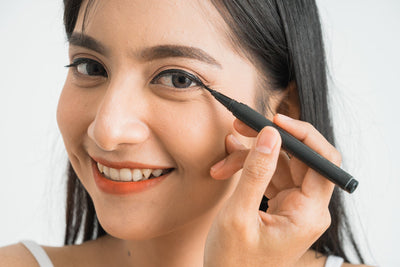
HOW TO APPLY EYELINER
- Start with clean, dry eyes. Apply your eye makeup before your eyeliner.
- Position your mirror so you're looking down into it. This gives you a better angle for application.
- Using small strokes, draw a line from the inner to the outer corner of your eye along your lash line. Keep the line as close to your lashes as possible.
- If you have trouble drawing a straight line with your eyeliner, try the dot method: Create a line of dots along your upper lash line using your favorite pencil, gel, or liquid liner.
- If using gel eyeliner, use a pointed brush to apply the dots. Next, use a stiff angled brush to blend and connect the dots together to create one smooth line. Voila! No more shaky, unevenly lined eyes.
- For a winged look, extend the line slightly upward at the outer corner of your eye.
Do not pull and tug on your lids as you apply eye liner (or any other time for that matter). The skin around your eyes is extra delicate; pulling and rubbing your lids can cause wrinkles and fine lines to appear.
MASCARA: THE FINISHING TOUCH
Section Takeaways
- The importance of mascara
- How to choose the right mascara
- Curling your lashes
- Step-by-step guide to applying mascara
- Pro tips to avoid common mistakes
When it comes to enhancing natural beauty, mascara is an absolute game-changer, especially for older women. Mascara is key to combat the hooded eyes that come with age. And as we age, our lashes can become thinner and lighter. Mascara is the perfect tool to combat this, adding volume, length, and definition to make your eyes pop. It's not just about looking younger, it's about emphasizing one of your most expressive features. Who wouldn't want their eyes to be the star of the show?
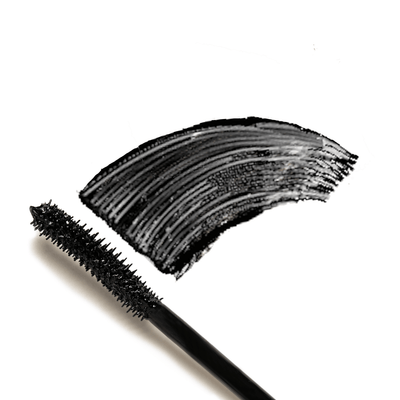
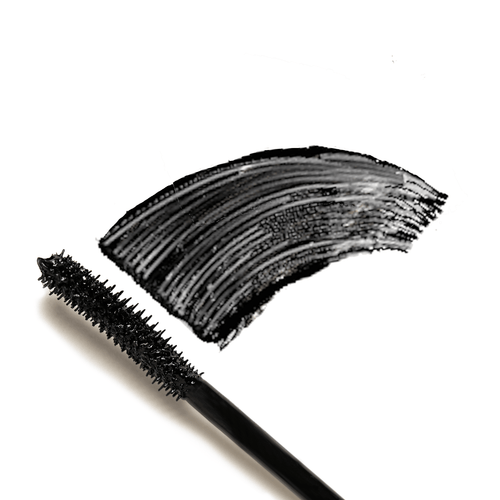
So, how do you choose the right mascara? With so many options on the market, it can feel overwhelming. First, consider your needs. Are you looking for volume, length, or both? Do you prefer a natural look or something more dramatic? Waterproof or regular? The answers will guide your choice because the formulation, brush shape, and size of the wand will create different lash effects.
We like using the Lancôme Monsieur Big Volumizing Mascara or Urban Decay Volumizing Mascara but don't be afraid to try different brands and formulas until you find your perfect match. We do recommend only using a waterproof-formula mascara only as needed and not on a daily basis as we believe it is more strain on your eyelashes. Remember, the right mascara can make all the difference!
Multicolumn
-
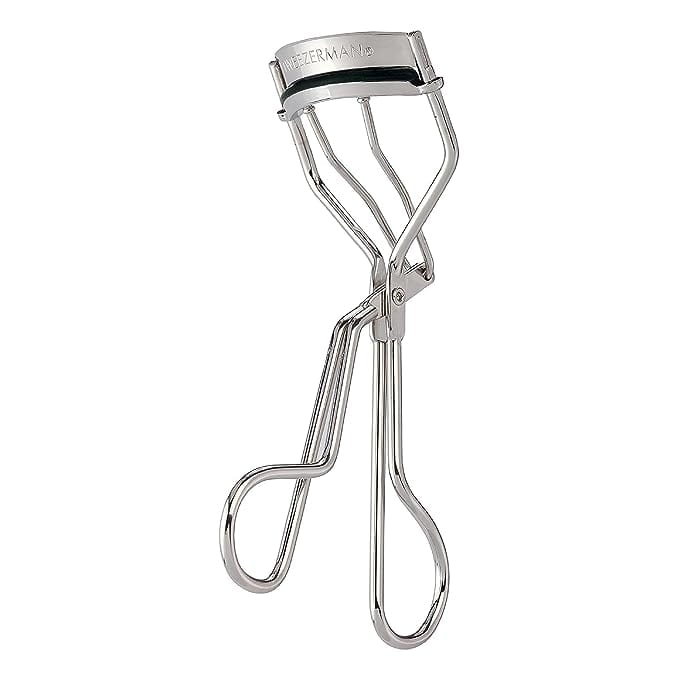
Traditional Curler
A high quality traditional eyelash curler with retractable spring for smooth opening and closing action is a key tool for eyelashes. The brand Tweezerman's Classic Eyelash Curler in Stainless Steel would be a great additional to your eyelash tool kit.
-
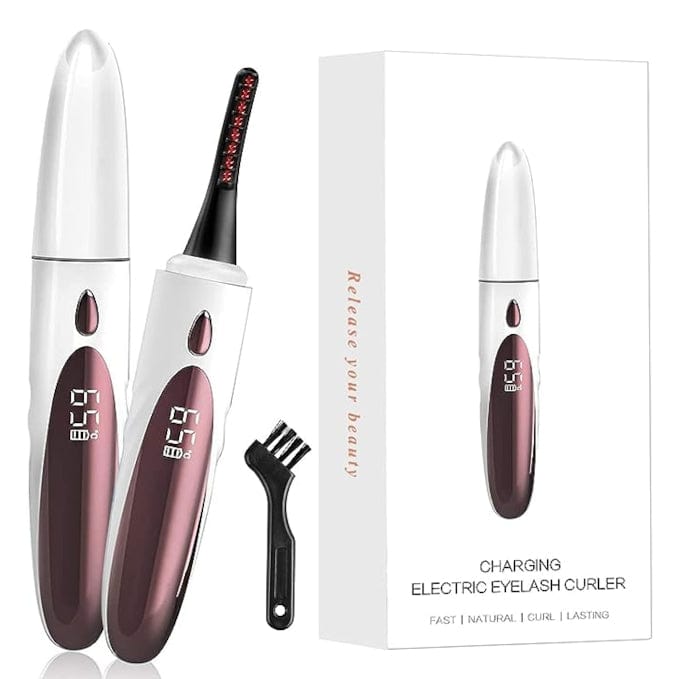
Heated Curler
For a more modern approach to eyelash curling, you can go with a heated curler. We like this highly rated professional curved curl edge comb brush head product. It heats up in around 8 seconds and has adjustable temperature levels.
-
Spoolie Brush
A spoolie brush for your eyelashes is a must. For a great double ended product with an angled brush on one end, and a quality spoolie on the other end, look no further than our own Pro Grip Angled Eyebrow Brush that be used for eyelashes too!


HOW TO CURL YOUR LASHES BEFORE APPLYING MASCARA
Curled lashes immediately opens up your eyes. This is especially important as many older women develop droopy, hooded eyes (thanks, gravity!) There are 2 types of curlers: traditional curlers, and heated curlers. Traditional curlers tend to be easier to use, while some heated curlers can keep your lashes curled for days!

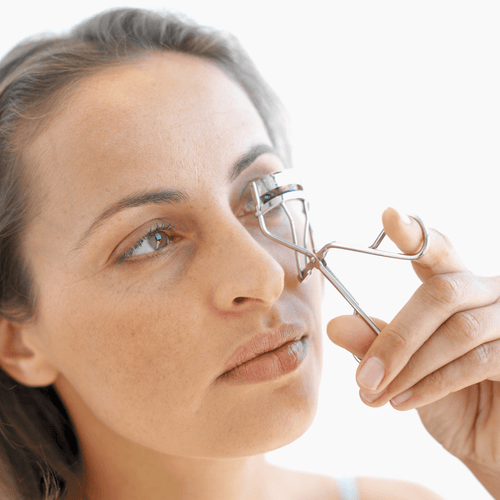
Curling your lashes is much easier than it seems. First, stand close to a mirror and take your eyelash curler as close to your lid as you feel comfortable. Gently pinch at the base, then rotate hand upwards, gently pinching as you move the curler up towards the tip of your lashes. The key is to be gentle when pressing.
Pro Tip: Don't Pump...Twist!
Never pump the mascara wand into the tube! Instead, you should use a twisting motion to pick up product on to the brush. Pumping will introduce excess air into the tube, causing your mascara to dry out and clump.

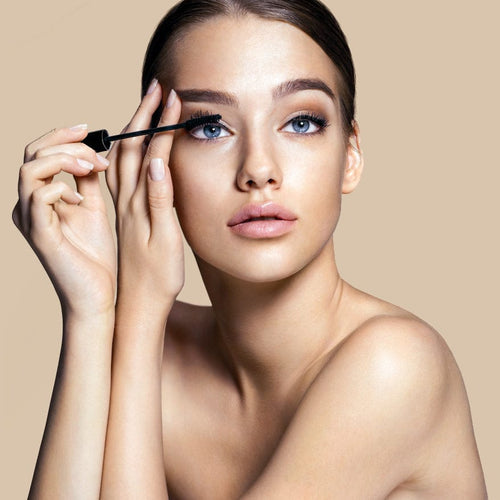
HOW TO APPLY MASCARA
Now, let's talk about application. Here's a step-by-step guide that will help you get the most out of your mascara:
- Curl your lashes: This will give them a nice lift and make your eyes look more open.
- Wipe off excess mascara: Too much product can lead to clumps. Simply wipe the wand on the edge of the tube to remove any excess.
- Apply mascara from the roots to the tips: Hold the mascara wand at the base of your lashes and gently wiggle it as you move towards the tips. This ensures every lash is fully coated and adds extra volume.
- Use a spoolie brush or lash comb: This will separate your lashes and remove any clumps, giving you a clean, defined look.
- Repeat. For a daytime look, limit to one coat mascara. In the evening, feel free to add a second coat of mascara for a more dramatic effect, but be sure to wait for first coat to dry before applying the second coat.
Pro Tip: Keep Fresh Mascara on Hand
Don't forget to replace your mascara every 3-4 months to prevent bacterial growth. Buy ahead of when you'll need it.
WHY EYE SHADOW MAY NOT BE THE BEST CHOICE
Section Takeaways
- The challenges of using eye shadow with aging skin
- Alternatives to using eye shadow
- When and how to use eye shadow properly
Have you ever wondered why your eye shadow doesn't seem to work quite as well as it used to? As we age, our skin changes and the makeup techniques that once worked wonders for us might not be as effective anymore. For older women, eye shadow can sometimes highlight the very imperfections we're trying to hide. Crepey or loose skin on the eyelids can make it difficult to apply eye shadow evenly and may actually accentuate fine lines and wrinkles!

But don't worry, there are plenty of alternatives to using eye shadow that can still give your eyes that beautiful pop. One such alternative is using an eye primer or a colored cream base. Not only do these products help smooth out the texture of your eyelids, but they also create a neutral canvas that brightens your eyes without adding too much color or shimmer. Another great option is to use a soft pencil or gel eyeliner. These products can be smudged out to give a subtle, smoky effect that defines your eyes without being too harsh.
Now, this isn't to say that you should completely ditch your favorite eye shadows! There's still a time and place for them, it's all about knowing how to use them properly. If you choose to use eye shadow, opt for matte or satin finishes instead of shimmery ones. These formulas are less likely to settle into fine lines. Also, stick to neutral, lighter shades to brighten up your eyes instead of darker ones which can make them look smaller. Remember, less is more when it comes to eye shadow on mature skin. And don't forget to blend, blend, blend!
FOUNDATION OR TINTED MOISTURIZER?
Section Takeaways
- Understanding the benefits of tinted moisturizer for mature skin
- How to choose the right shade of tinted moisturizer for gray-haired women
- The proper way to apply tinted moisturizer for a natural, flawless look
Foundation and tinted moisturizers both offer benefits for mature skin. When deciding which one to use, it all comes down to personal preference. Tinted moisturizers or a tinted sunscreen is a great alternative if you want more coverage than a simple moisturizer but less than a full-coverage foundation. They provide light coverage and hydration, making them the perfect choice for mature skin. Plus, they're easy to apply and blend in effortlessly.
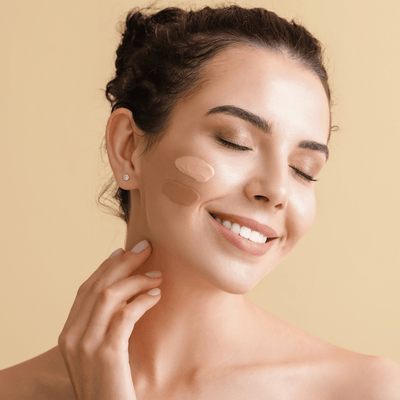

Tinted moisturizers are available in a variety of shades, although the options tend to be more limited compared to foundation. Therefore, it is crucial to select a shade that complements your natural skin tone and harmonizes with your hair color, especially if you have gray hair. For example, when choosing a tinted moisturizer for gray-haired women, opt for shades that are slightly warmer than your natural skin tone to keep the look balanced.
HOW TO APPLY TINTED MOISTURIZER
- So, how do you apply this wonder-product for that flawless, natural look? Start with a clean, well-moisturized face.
- Then, using your fingers, apply the tinted moisturizer just as you would a regular moisturizer, blending outward from the center of your face. This ensures even coverage and helps the product meld into your skin, providing that elusive 'no-makeup' makeup look. Alternatively, use a foundation brush or beauty sponge to blend it into your skin in circular motions.
- Keep the application light—start with a small amount and build up coverage as needed. Got some areas that need a little extra love? Dab on a tad more. But remember, less is more with tinted moisturizer. Its beauty lies in its lightness.
- Optional. Finish off the look by setting your face with a lightweight translucent powder to keep your makeup in place all day long!
Pro Tip: Use a Setting Spray
Use a setting spray to help your makeup last all day long! By taking these extra steps, you'll get the most out of your tinted moisturizer and enjoy beautiful results that last.
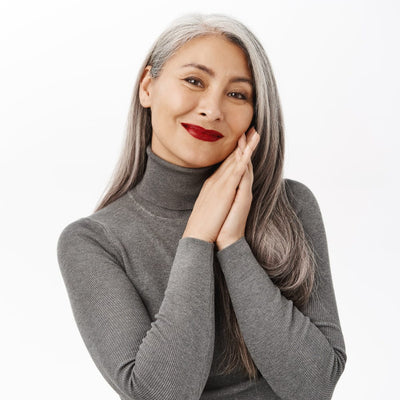
LIPSTICK: THE ULTIMATE ACCESSORY FOR A BOLD LOOK
Section Takeaways
- Understanding the significance of lip liner and lipstick in enhancing your natural lip shape and adding a pop of color
- Tips on choosing the right shade of lipstick and lip liner for your complexion and hair color
- Step-by-step guide on properly applying lip liner and lipstick for a flawless finish.
Lipstick is the ultimate accessory. With just a swipe of color, you can instantly brighten your face and add a bold touch to any makeup look. Lipstick is more than just a cosmetic product - it's a powerful tool that can instantly transform your look, mood, and even your whole day! Want to make a bold statement? Reach for a fiery red. Craving subtle sophistication? A nude shade is your best bet.

Now, onto the big question: How do you choose the best lipstick for gray hair? When it comes to choosing shades, make sure they complement your skin tone and hair color. Here's a quick guide:
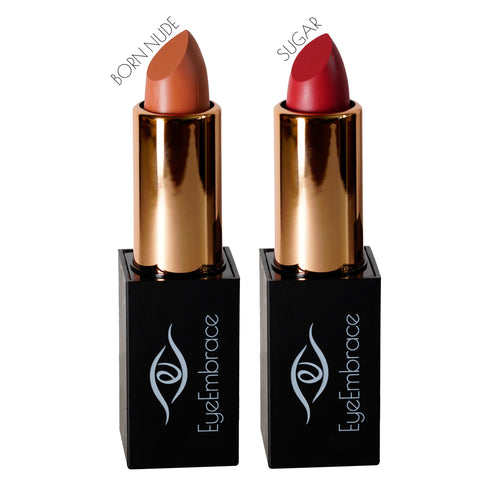
- Fair skin tones: Opt for lipstick shades in pinks, corals, or nudes with a blue undertone. You might want to give our Born Nude lipstick with hint of peach a try.
- Medium skin tones: Go for roses, berries, and mauves. Take a look at our Sugar red lipstick as an example of what might work for you.
- Dark skin tones: Reach for deep plums, berries, and reds.
And what about my silver-haired beauties? Bold reds with blue undertones (like Sugar) work wonders to brighten your complexion and complement your hair. If you prefer a more understated look, nude shades with a hint of pink or peach (like Born Nude) are a perfect choice.
HOW TO APPLY LIPSTICK LIKE A PRO
Ready to apply? Follow these easy steps for a flawless finish:
- Exfoliate and moisturize: For a smooth application, start by gently exfoliating your lips with a lip scrub or a toothbrush. Follow up with a hydrating lip balm.
- Outline with lip liner: Lip liners help define and shape the lips, and prevents your lipstick from bleeding. Trace the outline of your lips with a sharp lip liner that matches your lipstick using short strokes that follow the natural lines of your lips. Blend in any harsh edges so they look smooth and even.
- Fill in with lipstick: Apply your chosen lipstick, starting at the center of your upper lip and moving outward towards the corners. Repeat on your lower lip.
- Blot and reapply: Blot your lips with a tissue to remove excess lipstick and then reapply for long-lasting color.

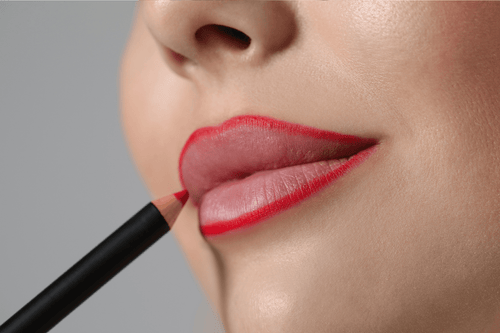
DEFINE YOUR LIPS WITH LIP LINER
Although lip liner is optional, it can make your lips look more defined. Follow these steps to apply your lip liner like a pro:
- Prep your lips with a hydrating lip balm. If you want to, you can exfoliate your lips before applying the hydrating lip balm.
- Choose a lip liner that matches your lip color or your lipstick/lip gloss. You don’t want the lip liner and lipstick to clatch together, so pick a combination in the same shade family.
- Outline your lips with the lip liner, starting at the outer edges of your upper lip and working to the center. Then do the same thing with your bottom lip; start at the outer edges and work to the center.
- If you want a long-lasting and natural effect, fill your lips with the lip liner.
Pro Tip: Wipe Your Lips Before Reapplying
To make sure your lipstick looks as good as new, use makeup remover wipes or micellar water to get rid of any excess color before reapplying it. This will help keep your lipsticks in tip-top shape so you can enjoy them for longer.
FINAL THOUGHTS ABOUT THIS TUTORIAL
- Recap of key points
- Encouragement and final tips for embracing gray hair with the right makeup.
There you have it! You now have all the tools to master makeup as a Silver Sister. Hope this comprehensive guide will help you master how to apply makeup for gray hair.

Remember that experimenting is the key! Don't be afraid to try out new shades and textures. And most importantly, have fun while embracing your beautiful silver locks.
Beauty is subjective, no matter what color hair you have. Embrace your tangled silver with confidence and find ways to accentuate it with subtle makeup. After all, beauty is about celebrating who you are. We wish you all the best in your beauty journey and feel free to reach out to us with any questions or comments!